
Transferring a domain name to a new registrar can seem complex. But it’s easier than you think.
With the right steps, you can do it smoothly. Switching your domain name to a new registrar might be necessary for various reasons. Maybe you found better prices, or perhaps you’re not happy with your current registrar’s services. Whatever the reason, the process doesn’t have to be daunting.
In this guide, you’ll learn the steps to transfer your domain name. We’ll simplify each part, ensuring you understand what to do. By the end, you’ll feel confident handling the transfer on your own. Let’s get started!
Preparation Steps
Transferring a domain name to a new registrar involves several steps. These steps ensure a smooth transition. The first stage is preparation. Proper preparation prevents any issues during the transfer process. Below are key preparation steps you need to follow.
Check Domain Eligibility
Before transferring your domain, ensure it is eligible for transfer. Check if the domain is at least 60 days old. Ensure it is not in a locked or suspended state. Verify there are no pending legal disputes or administrative actions.
Unlock Your Domain
Next, unlock your domain at the current registrar. This step is crucial. Log in to your registrar’s account. Navigate to the domain settings. Find the option to unlock the domain. Confirm the domain status shows as unlocked.
Obtain Authorization Code
Finally, get the authorization code from your current registrar. This code, also known as EPP code, is essential for the transfer. It is a unique code that verifies your ownership. Request this code through your registrar’s control panel. Some registrars email the code to the registered email address.

Credit: www.nameboy.com
Choosing A New Registrar
Transferring a domain name to a new registrar can seem complex. But, with the right steps, it becomes manageable. The first step is choosing the right registrar. This step is vital as it affects your domain management experience.
Research Potential Registrars
Begin by compiling a list of potential registrars. Look for established companies with a good track record. Ensure they offer the services you need for your domain. Consider the ease of use of their platform. Also, check if they provide customer support when needed.
Compare Pricing And Features
Next, compare the pricing of different registrars. Some may offer lower prices, but with fewer features. Others might have higher prices but offer additional benefits. Look for any hidden fees that might apply. Make sure you get value for your money.
Check Customer Reviews
Finally, read customer reviews of each registrar. Reviews can give insights into the experiences of other users. Look for comments on customer service, reliability, and any issues faced. This helps you make an informed decision.
Initiating The Transfer
Transferring a domain name to a new registrar can seem difficult. But with clear steps, it becomes manageable. This section will guide you through initiating the transfer. Follow these steps to ensure a smooth process.
Create An Account With New Registrar
First, you need an account with your new registrar. Visit the registrar’s website and sign up. Provide your basic information like name, email, and contact details. Choose a strong password to secure your account. Once your account is created, you can proceed to the next step.
Submit Transfer Request
Now, it’s time to submit the transfer request. Log in to your new registrar account. Look for the domain transfer option, usually found in the domain management section. Enter the domain name you want to transfer. The registrar may ask for additional information. Fill out all required fields and proceed to submit the request.
Provide Authorization Code
To authorize the transfer, you need an authorization code from your current registrar. Log in to your current registrar account. Navigate to the domain management area. Find the option to get the authorization code. Copy this code carefully.
Go back to your new registrar account. Enter the authorization code in the provided field. This step is crucial for verifying the transfer request. Double-check the code for accuracy before submitting it.
After entering the code, follow any additional instructions provided by the new registrar. The transfer process will begin, and you will be notified once it is complete.
Credit: www.godaddy.com
Verifying The Transfer
Verifying the transfer of your domain name is a crucial step. This ensures the process completes smoothly. It also ensures the security of your domain. This step involves a few important actions. Each action requires your attention to detail. Let’s break down these tasks.
Confirm Transfer Email
After you request a domain transfer, check your email. The new registrar will send a confirmation email. Open this email and follow the instructions. Usually, you need to click on a confirmation link. This step verifies your intention to transfer the domain. It also ensures the new registrar has the correct email.
Approve Transfer With Current Registrar
Next, log into your current registrar’s account. Look for a transfer approval request. Approve this request to move forward. Some registrars may ask for additional verification. Follow the given steps carefully. This approval tells your current registrar you agree to the transfer. It’s an essential part of the process.
Monitor Transfer Status
Once the transfer is approved, monitor the status. Both registrars will update you via email. Keep an eye on these emails. They will inform you of any issues or delays. You can also log in to both registrars’ accounts. Check the status there for updates. This helps you ensure the transfer completes without problems.
By staying informed, you can address any issues quickly. Successful transfers often depend on your prompt actions.
Post-transfer Steps
Congratulations! You’ve successfully transferred your domain name to a new registrar. But, your work isn’t done yet. There are essential steps to ensure everything runs smoothly.
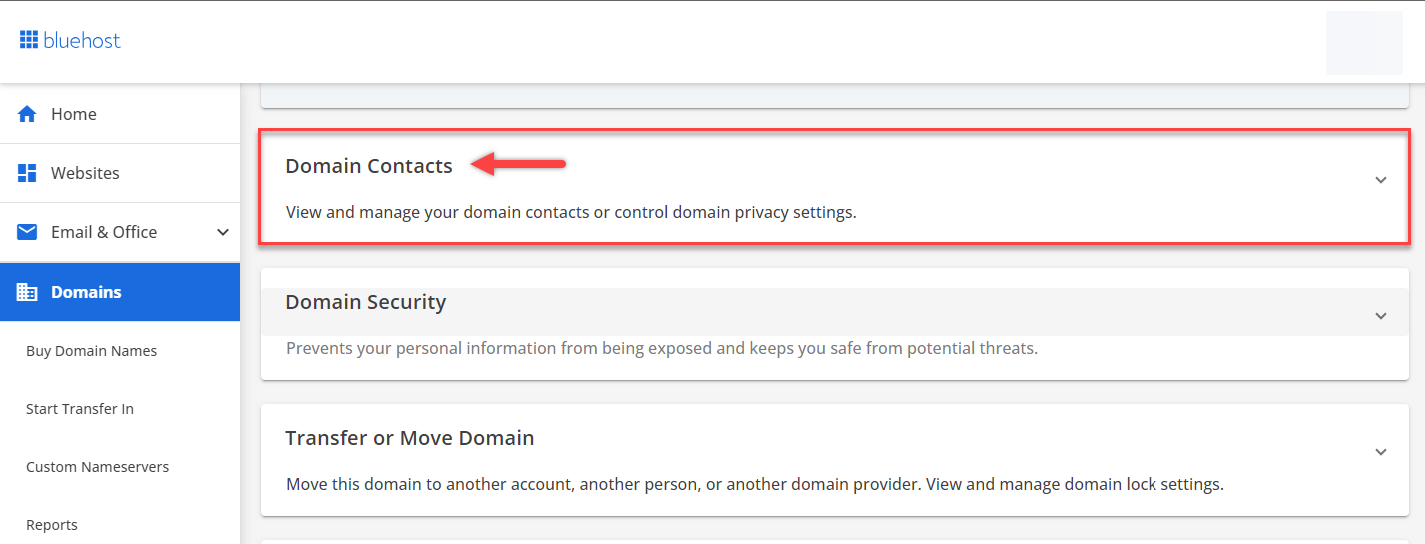
Update Contact Information
First, log in to your new registrar account. Check the contact information linked to your domain. Make sure your email address and phone number are current. This ensures you receive important notifications. Keeping this information updated helps avoid any disruptions.
Configure Domain Settings
Next, configure your domain settings. Go to the domain management section. Set up auto-renewal to avoid losing your domain. Review privacy settings to protect your personal data. Adjust your name servers if needed. This step is crucial to maintain your website’s functionality.
Check Dns Records
Finally, check your DNS records. Ensure they point to the correct servers. Verify records such as A, MX, and CNAME. This step is vital for your website and email services to work properly. Any mistake here can lead to downtime.
By following these steps, you ensure a smooth transition. Your website and services will continue to function without issues.
Credit: www.bluehost.com
Handling Common Issues
Transferring a domain name to a new registrar can sometimes present challenges. Understanding how to handle common issues ensures a smooth transfer process. Below, we address typical problems and their solutions.
Resolving Transfer Rejections
Transfer rejections are common. They occur due to various reasons. Ensure your domain is not within 60 days of registration or a previous transfer. Verify your contact information is up to date. This helps avoid rejections related to verification failures.
Check with your current registrar. Understand the specific reason for the rejection. Once identified, resolve the issue and initiate the transfer again.
Handling Domain Lock Issues
Domains are often locked by default. This prevents unauthorized transfers. Before transferring, you must unlock your domain. Log in to your current registrar’s account. Find the domain settings and disable the lock.
Sometimes, the lock status might not update immediately. Check after a few hours. Ensure the domain is indeed unlocked before proceeding with the transfer.
Addressing Authorization Code Problems
The authorization code, also known as EPP code, is crucial. Without it, the transfer cannot proceed. Request the code from your current registrar. They usually send it to your registered email.
If you do not receive the code, contact your registrar’s support team. Ensure your email address is correct and up to date. Once you get the code, use it to complete the transfer with your new registrar.
Ensuring Domain Security
Transferring a domain name to a new registrar can be a complex task. Ensuring domain security during this process is crucial. Failing to secure your domain can lead to unauthorized access or loss of control. Here are some key steps to ensure your domain remains safe.
Enable Domain Lock
Domain lock prevents unauthorized transfers. It ensures only you can transfer your domain. Most registrars offer this feature. Check if your domain is locked. If not, enable it through your registrar’s control panel. This simple step adds a strong layer of security.
Set Up Two-factor Authentication
Two-factor authentication (2FA) adds an extra layer of security. It requires two forms of identification. Usually, this is your password and a code sent to your phone. Set up 2FA in your registrar’s settings. It makes unauthorized access much harder.
Monitor For Unauthorized Changes
Regularly check your domain settings. Look for any unauthorized changes. This includes contact details and name servers. Many registrars offer alerts for changes. Enable these alerts to stay informed. Prompt action can prevent potential issues.
Understanding Transfer Policies
Transferring a domain name to a new registrar involves understanding various transfer policies. These policies ensure a smooth and secure transfer process. Knowing these rules can help avoid delays and complications. Below, we’ll explore ICANN transfer policies, registrar-specific rules, and transfer timeframes.
Icann Transfer Policies
The Internet Corporation for Assigned Names and Numbers (ICANN) sets the rules for domain transfers. These rules apply to all registrars. Some key ICANN policies include:
- The domain must be at least 60 days old.
- The domain must not be in “Lock” status.
- The current registrar must provide an Authorization Code (EPP code).
- The admin contact must approve the transfer.
Understanding these ICANN policies is crucial. They help ensure the transfer goes smoothly.
Registrar-specific Rules
Each registrar may have additional rules. These rules can vary widely. Some common registrar-specific rules include:
- Specific fees for transferring out a domain.
- Additional verification steps.
- Different timeframes for processing transfers.
- Restrictions on certain domain types.
Check the specific rules of your current and new registrars. This helps avoid unexpected issues.
Transfer Timeframes
Knowing the expected timeframes helps plan the transfer process. Generally, the transfer process involves these steps:
- Request transfer from the new registrar.
- Obtain the Authorization Code from the current registrar.
- Approve the transfer through email verification.
- Wait for the transfer to complete.
Typical transfer timeframes are:
| Step | Timeframe |
|---|---|
| Authorization Code Request | 1-3 days |
| Email Verification | 1-5 days |
| Transfer Completion | 5-7 days |
Patience is key. The transfer may take up to 14 days in total.
Frequently Asked Questions
Can I Transfer A Domain Name From One Registrar To Another?
Yes, you can transfer a domain name between registrars. Ensure the domain is unlocked and obtain the authorization code. Follow the new registrar’s transfer process for a successful transfer.
How Long Does It Take To Transfer A Domain To A New Registrar?
Transferring a domain to a new registrar typically takes 5 to 7 days. The exact duration depends on the specific registrars involved. Ensure you have the necessary authorization codes and disable any transfer locks to avoid delays.
How Do I Renew My Domain Name With A Different Registrar?
To renew your domain with a different registrar, unlock the domain, obtain the transfer code, and initiate the transfer. Confirm the transfer via email. Complete payment with the new registrar.
Does It Matter Who Your Domain Registrar Is?
Yes, it matters. A good domain registrar offers better security, support, and features. Choose a reputable registrar for reliability.
Conclusion
Transferring a domain name is a simple process. Follow the steps carefully. Unlock your domain and get the authorization code. Choose a new registrar and start the transfer. Confirm the transfer via email. Wait for the transfer to complete. Your domain will be with the new registrar soon.
No stress involved. Just a few steps and some patience. Now, you can manage your domain with your new registrar. Happy transferring!


